Online status is our biggest feature and also most important in Magicraft theme. Thanks to this feature you can show on website online status of your server and how many players you have. Setup online status is very easy in theme but you have to do some important changes in your Minecraft server settings.
Configuring minecraft server
There are two different options how to setup server for online status. If you are hosting server on your own machines at home or you using dedicated server. Second option is when you are using special minecraft game server hostings. These hostings already have all configurations for online status and you don’t have to do any changes in your server properties.
- Go into your server folder where are all files about your minecraft server.
- Open server.properties and line where is enable-query=false change to enable-query=true
- Now find line where is query.port=25565 . If you don’t have this line, make it! And remember, query port should never be the same as server ports. It’s different port and has to be different.
Configuring online status in theme
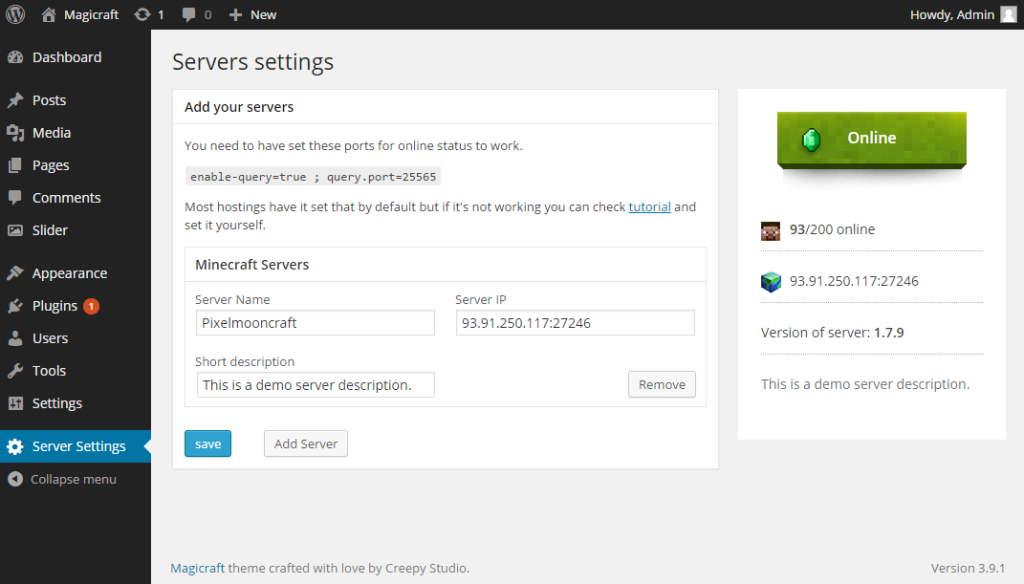
- Go in your wordpress administration menu on the left side, click on Server Settings.
- In Server Settings administration you can easily add your server or servers and manage names and ip adresses.
- Put server name (eg. survival, pvp) in the input.
- Now you have to add ip adress of your server. It doesn’t matter if you using ip adress throught domain or just numeric ip adress with port. Our online status accepts all variations of ip adress.
- Under server name you have input for Server description. Put there some basic informations about your server.
- Save setting to see changes on the right side.
Setup online status for more servers.
Yeah, I mentioned we also prepared online status for more servers. So If you have bigger community and more servers you can still simply show online status.
- When you add your first server, click on Add server and administration show you new table to add servers.
- Fill in all informations as we did it before.
- You can add more servers if you want, or remove some just by clicking on Remove.
- Save all your setting.

Showing online status on page
When you setup your online status you have to show it on page through widgets.
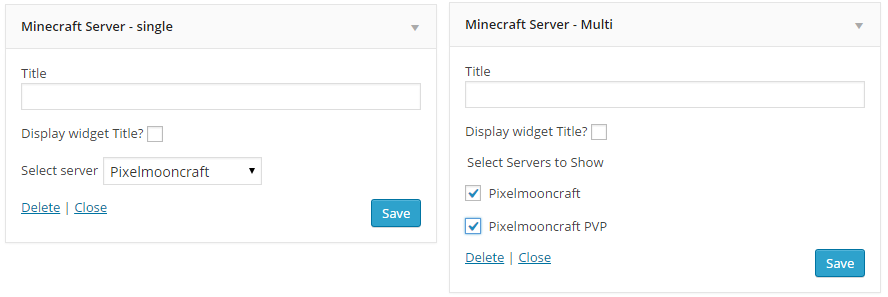
- Go to Appearance > Widgets, and there you will have 2 widgets Minecraft server – Single and Minecraft server – Multi.
- Choose one of these widgets. If you want a list of servers then choose multi. If you want just one server solo, then go for solo.
- Now choose widget area, where you would like to put this new widget, you can choose from Sidebar and Footer.
- So you added widget to widget area, great! Now just add few more settings.
- For Multi you see title, display title (It’s for design. If you want online status on the top of widgets don’t check it), and servers which you would like to show.
- Check boxes of servers which you want to show and Save.
- For Single you see title, display title ( Again it’s for design. If you want online status on the top of widgets don’t check it), and server which you would like to show.
- Select server which you want to show and hit Save.